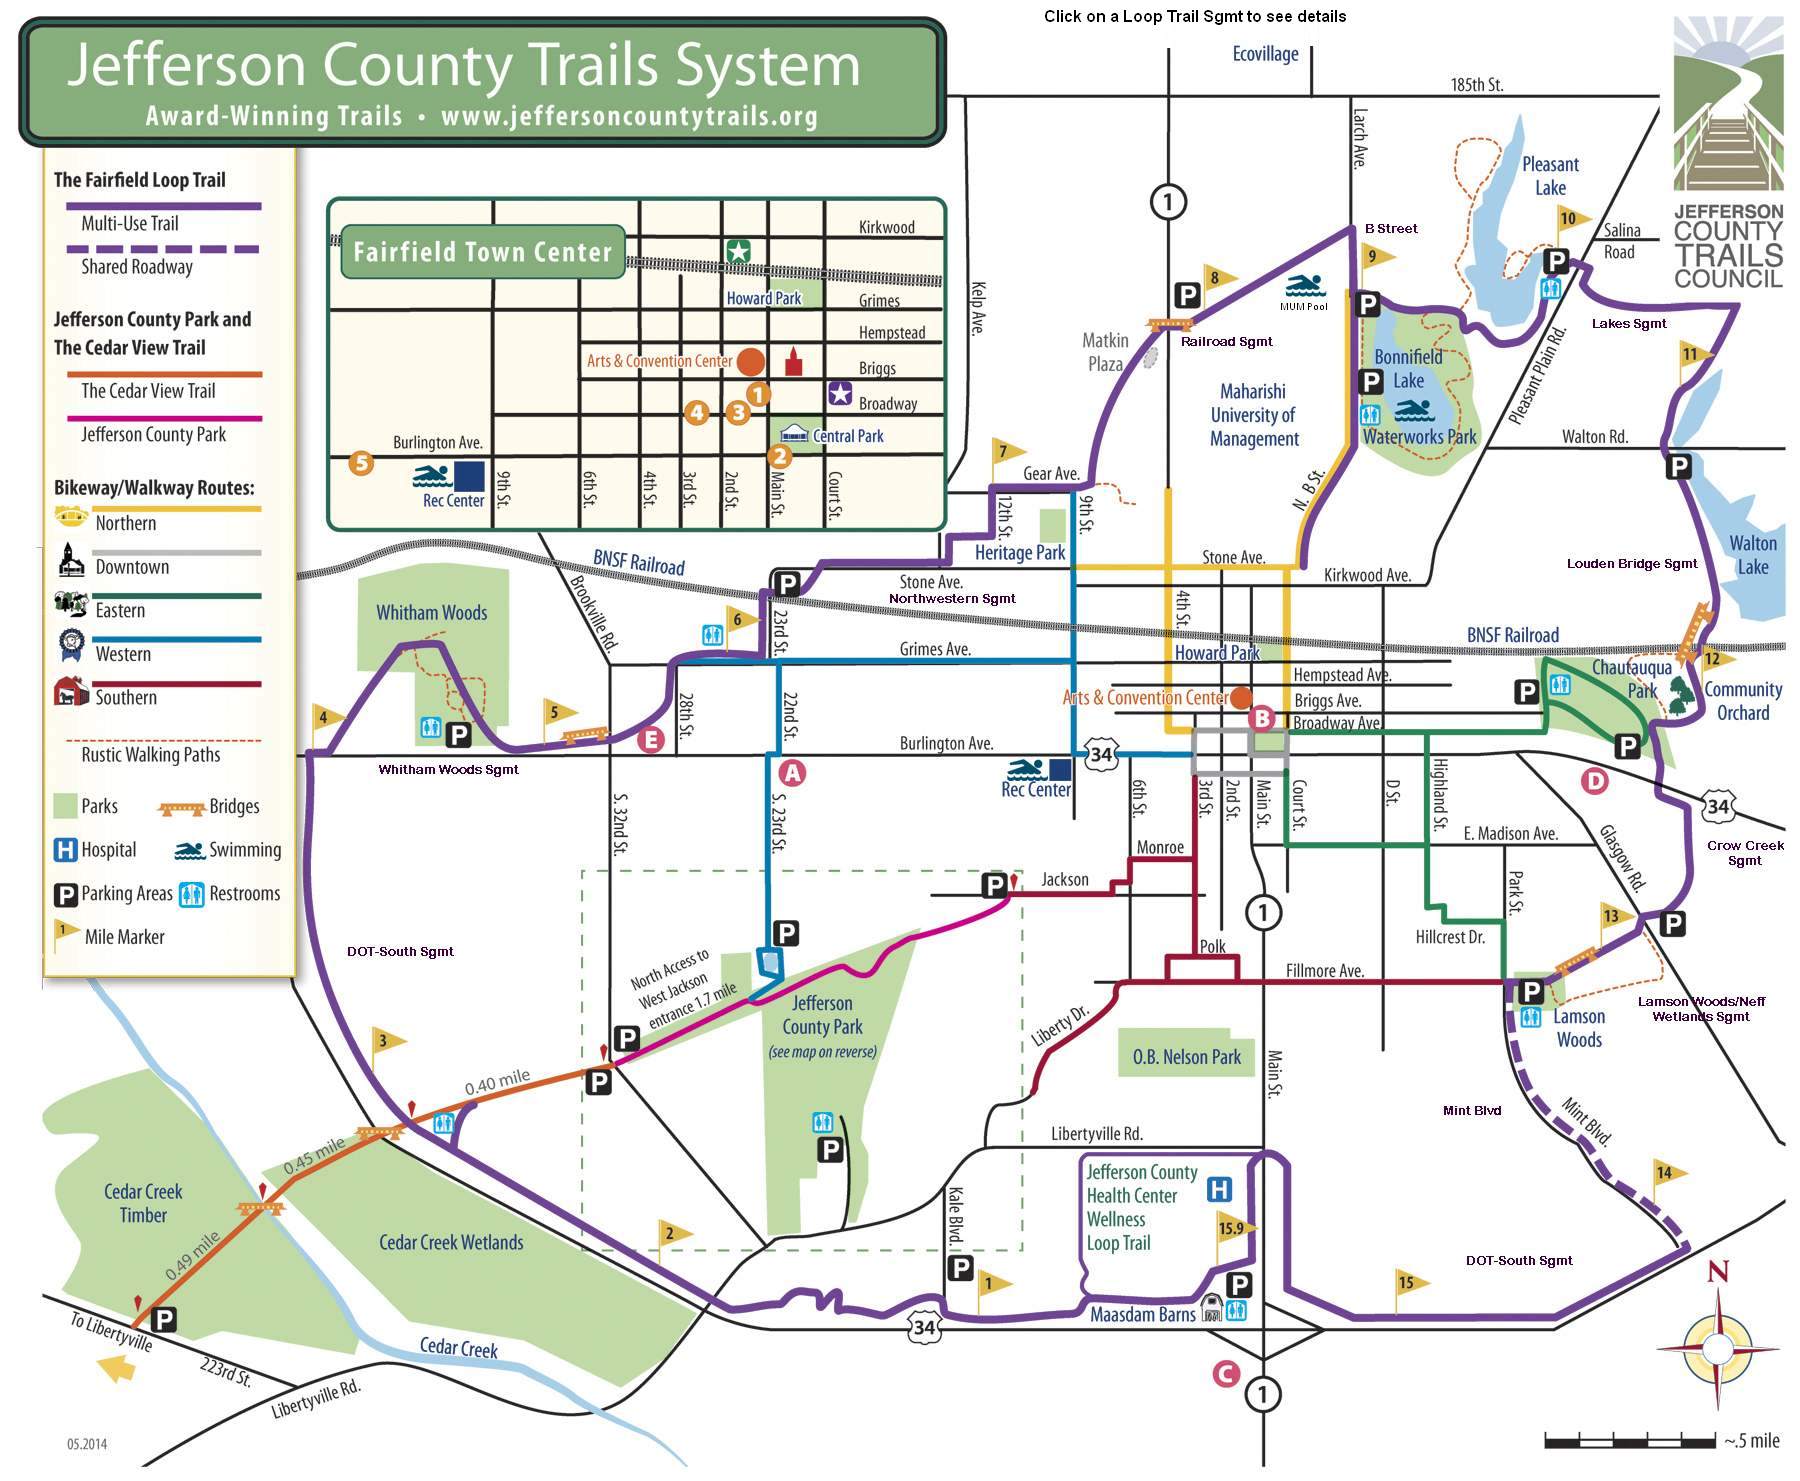
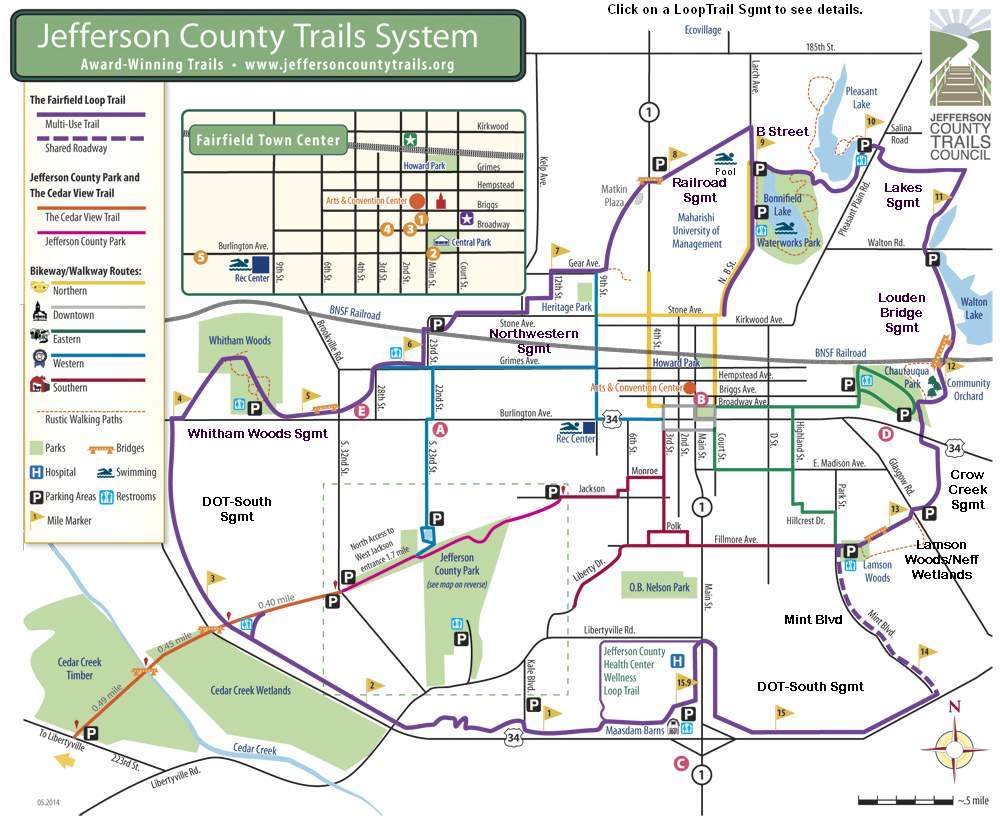
Construction Photos - Louden Bridge
Welcome to the Louden Bridge Construction Photo Essay (scroll down)
JCTC kept a photo record of the Louden Bridge construction, enabling you to "virtually visit" the bridge construction site (last updated 09-28-04).
The Jefferson County Trails Council looked for a way to cross the BNSF railroad tracks in order to complete the east side of the Fairfield Loop Trail.
The railroad suggested building a bridge at the point where the tracks run through a "cut", thereby making the approach to the bridge very gentle. A grant was obtained and construction started on April 19, 2004.
Here is a photo history of the Louden Bridge construction.
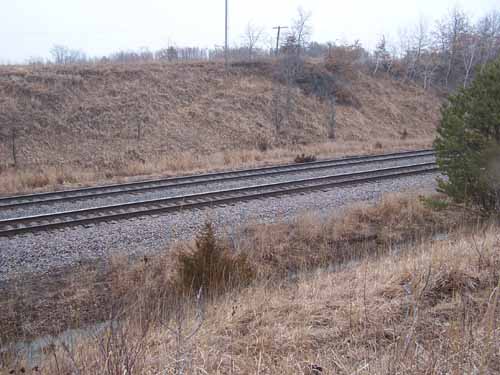
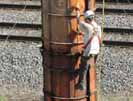
Louden Bridge site, in Feb 2004.
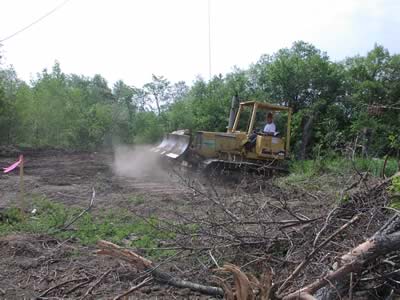
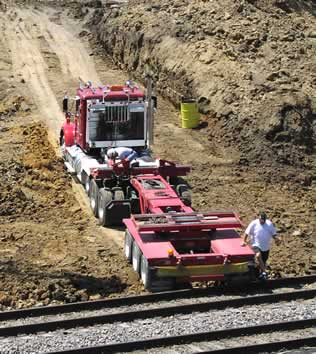
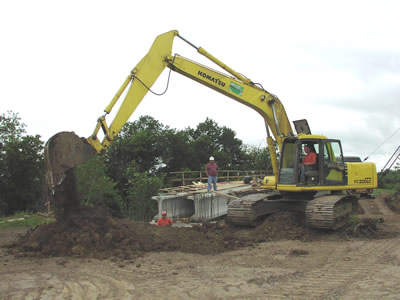
Look out! Here we come! April 19, 2004.
Are they dancing? U.S. Cellular tower in the background. Looking north.
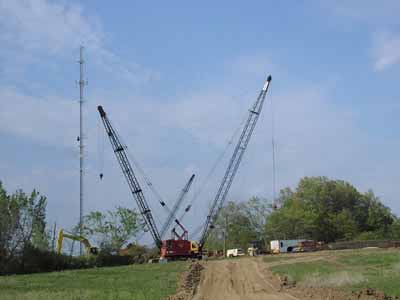
Job site viewed from the north.
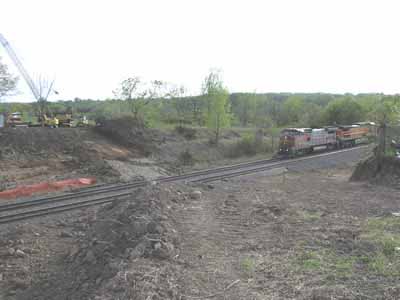
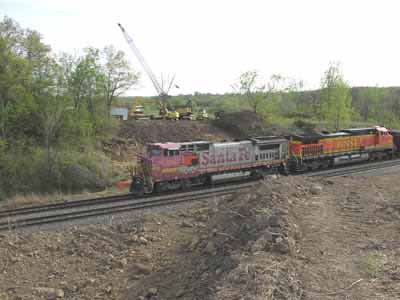
Don't cross yet-no bridge. Toot! Toot!
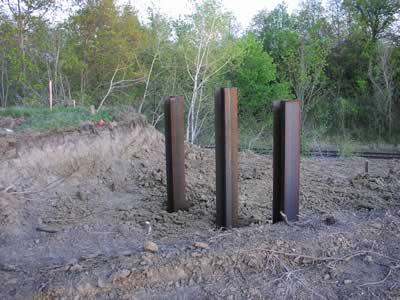
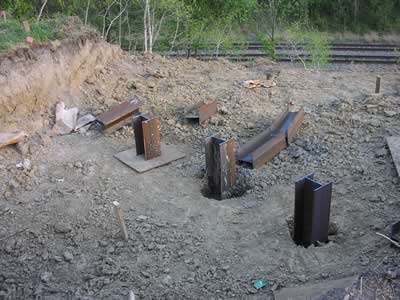
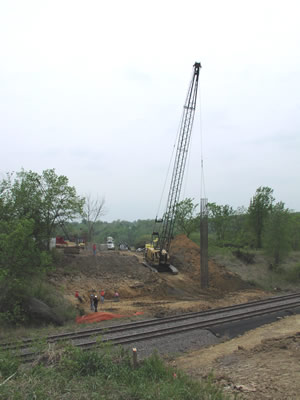
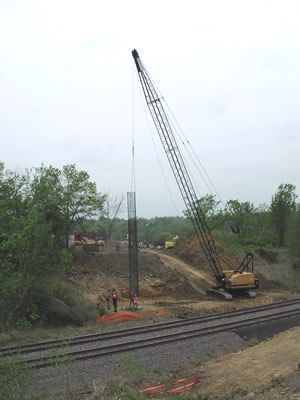
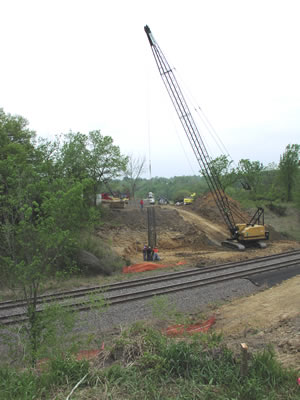
H-Piles, the anchors for the bridge abutments, viewed from the north.
South H-Piles are visible in the background.
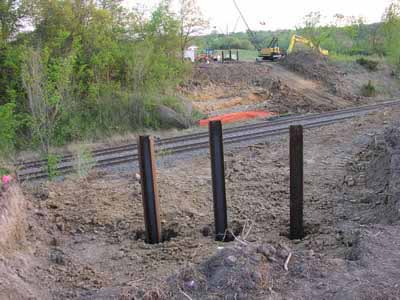
H-Piles, newly driven, close up.
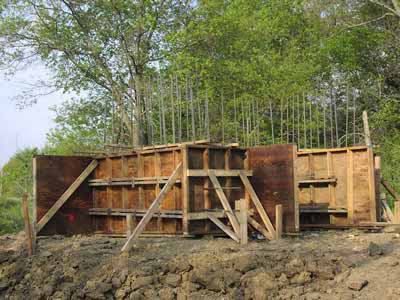
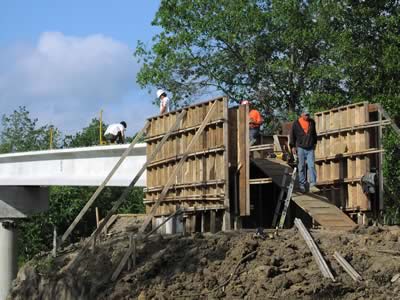
Forms are ready for the south bridge abutment concrete pour.
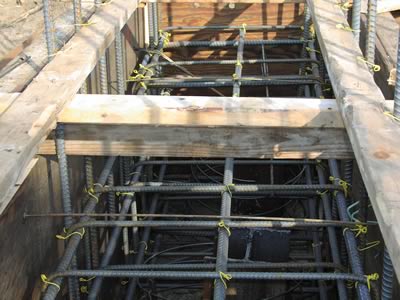
Note the top of the H-Pile in the foreground, under the rebar.
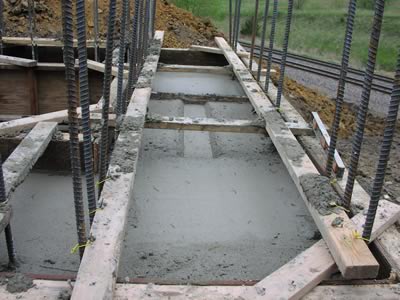
South abutment with concrete poured.
Forms have been removed from the south abutment.
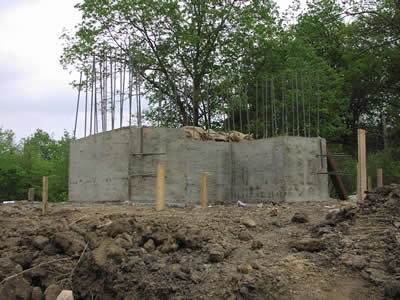
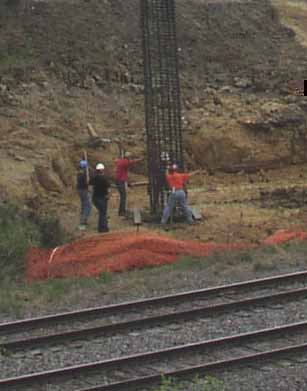
The north H-Piles are trimmed, ready for the north bridge abutment forms to be built.
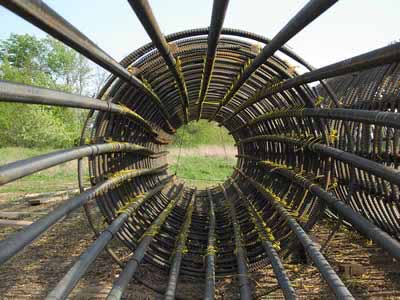
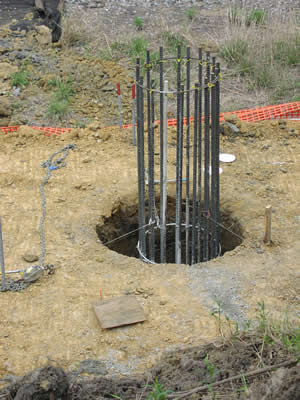
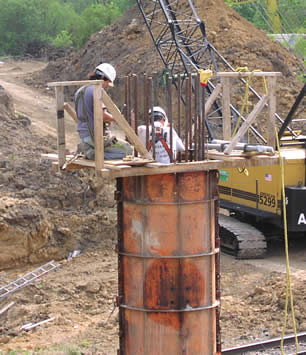
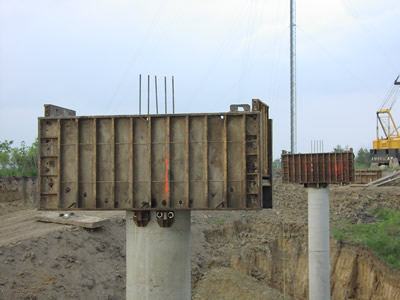
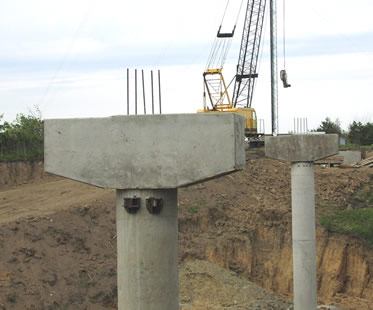
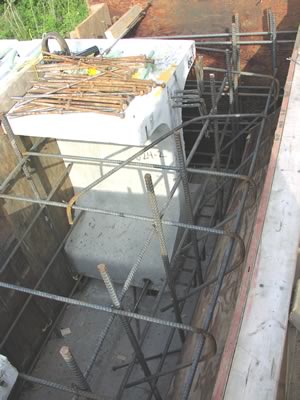
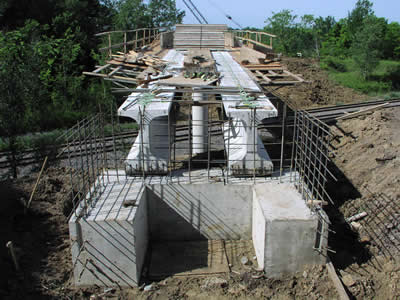
Rebar ready for a bridge pier - outside view.

Rebar ready for a bridge pier - inside view.
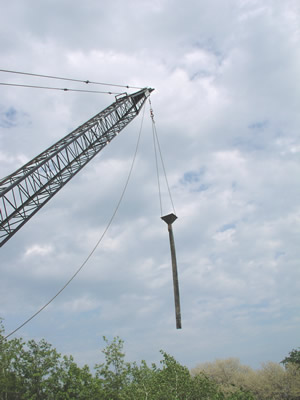
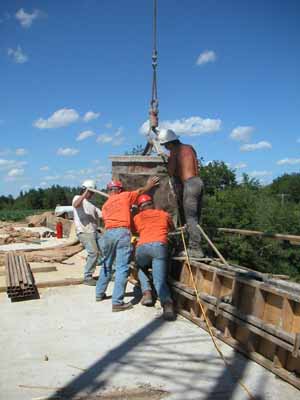
The rebar assembly for the south bridge pier being hoisted into place.
Bringing it to the hole.
Lowering into the hole.
Lowering it more, watching closely.
Lowering it more.
Still more to go.
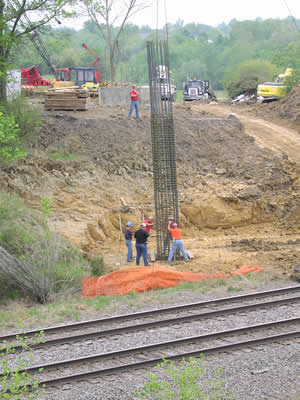
Making adjustments.

Ready for the concrete to be poured.
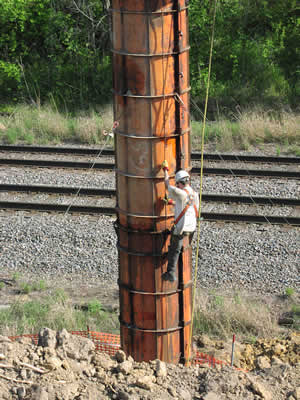
The south pier is still growing. Concrete has been poured.
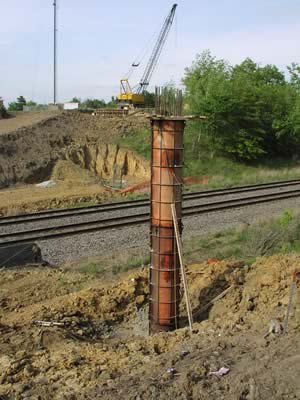
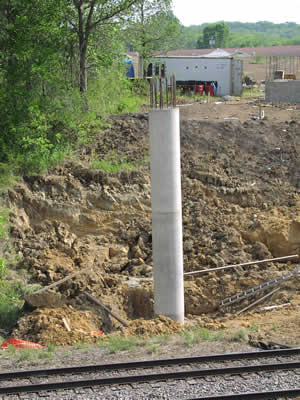
The forms have been removed.
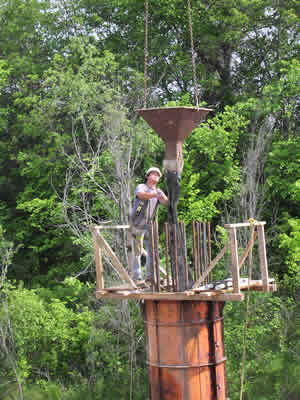
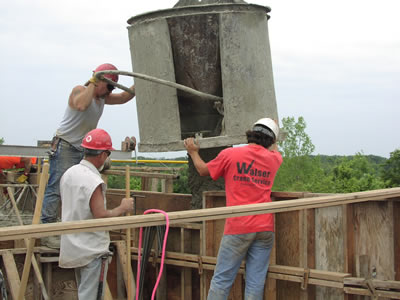
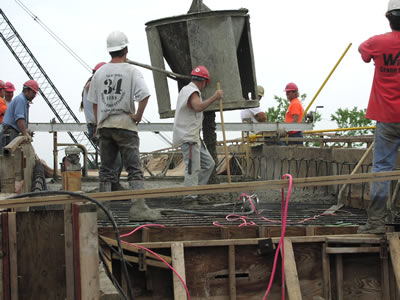
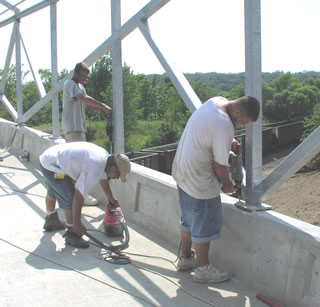
For the north pier, concrete is poured into the form. One man goes down into the form to run a vibrator to make the concrete settle.
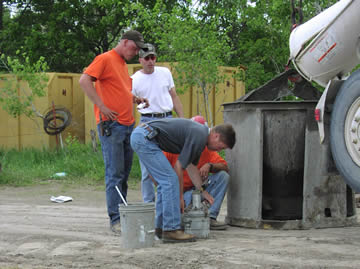
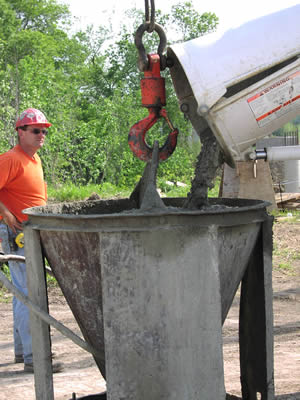
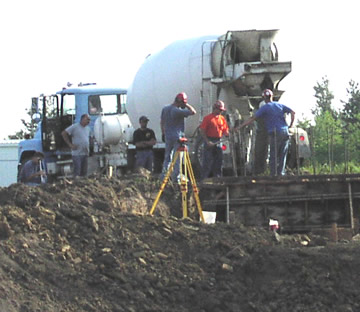
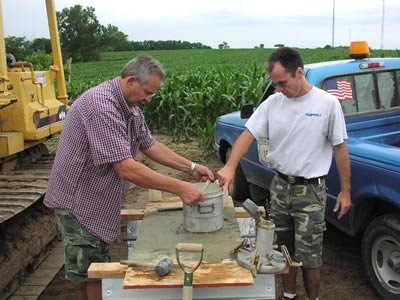
Jerry Bishop of French-Reneker Associates tests a sample of the concrete mix.
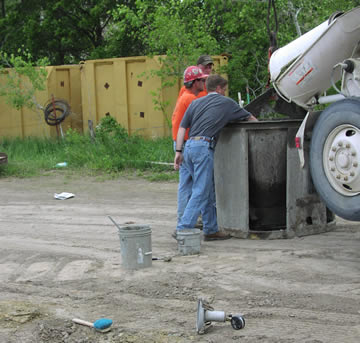
Filling the sample bucket.
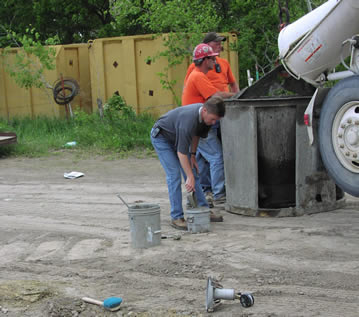
Setting up the instruments.
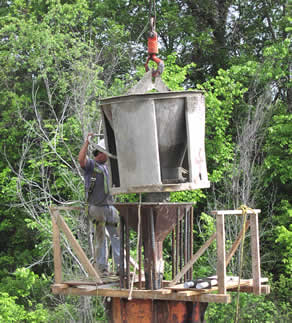
Hoisting the funnel, which has a long sleeve on it to start. As the form is filled up, they swapped it out for a short sleeve.
Lowering the funnel into the forms.
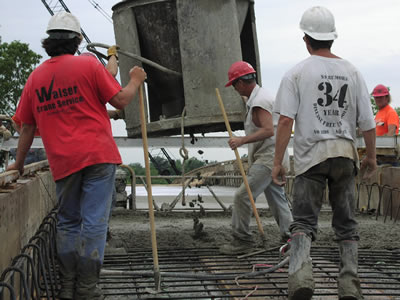
Filling the bucket from the concrete delivery truck.
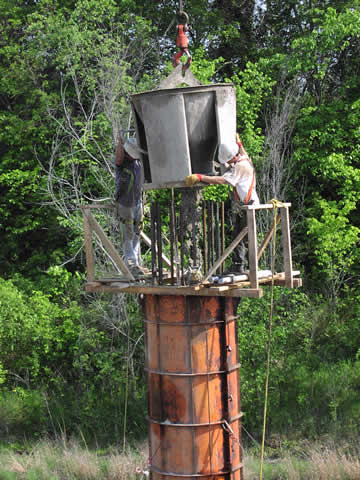
Hoisting the bucket to place it over the pier.
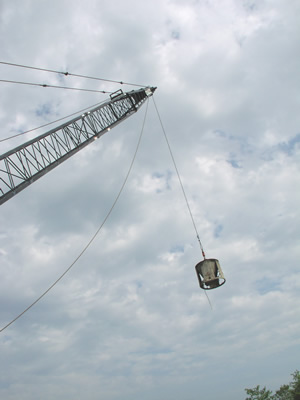
Positioning the bucket over the funnel.

A workman pulls a handle to release concrete into the funnel. It took several buckets of concrete to fill the pier form, over 9 cubic yards of concrete in all.
For the last couple of buckets, two men are up top. At this point, the funnel has been removed.
Climbing down after the pour is done.
The north abutment is under construction. Pouring the North abutment.
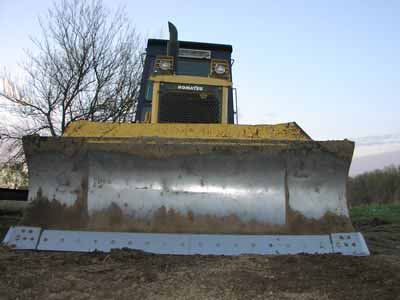
More preparation is needed. Can I drive?
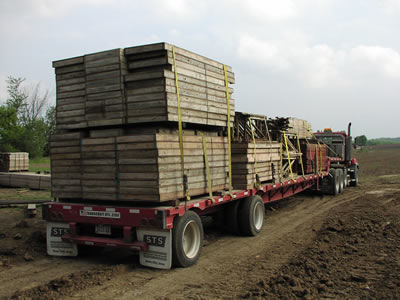
It takes a lot of forms to build this bridge. A temporary road was built. Who's going to sign for this delivery?
Everybody is curious about the construction. Where are the worms?
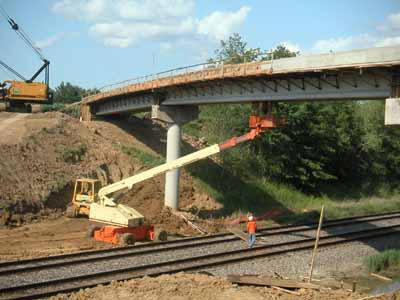
The bridge beams will be supported by the pier caps, which are on top of the piers. Another set of beams will reach to the abutments at each end of the bridge. The railroad requires 25 ft clearance over the tracks. The pier caps are ready for the concrete pour.
After the pour, the forms were removed. Looking from the south.
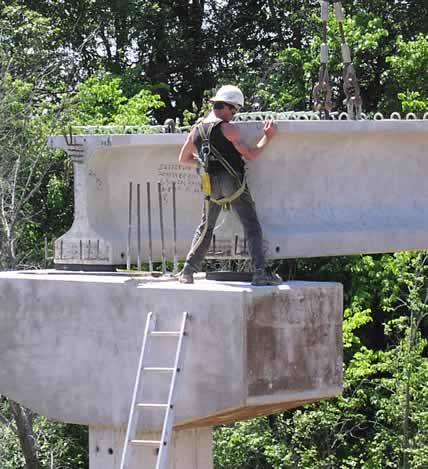
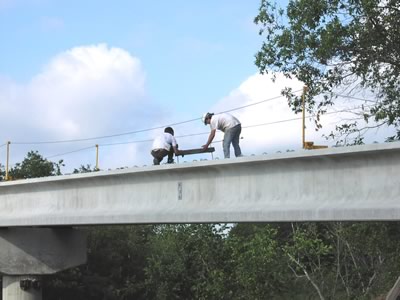
The first beam is in place. Note the worker walking along the beam.
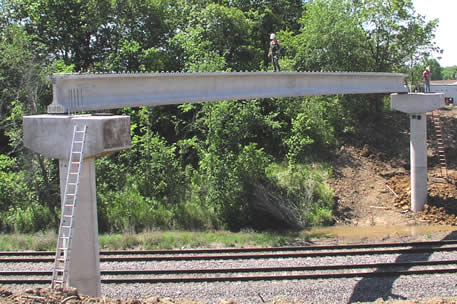
Work must stop while a train passes. Note workers at either end in a secure position against the beam.

Larger version. The Amtrak train is heading to Chicago.
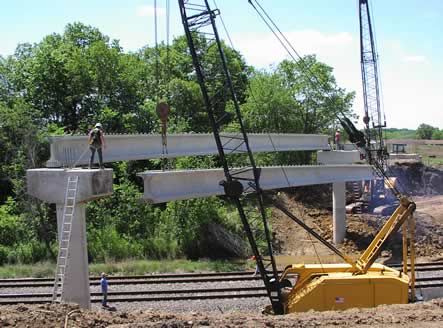
A truck arrives with the second beam.
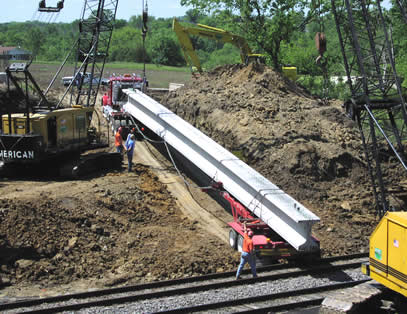
Hooking the crane cables to the beam.
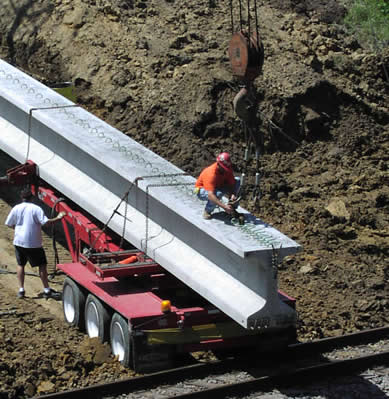
The beam is lifted off the truck. Notice that the truck is in two parts.
All in a day's work. One of the workers who will guide the beam into position waits nonchalantly.
Moving the beam. The trains can not pass under while beams are placed.
Rejoining the truck. While the beam is being maneuvered into position, workers join the two parts of the truck.
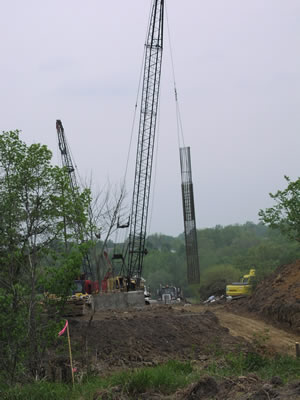
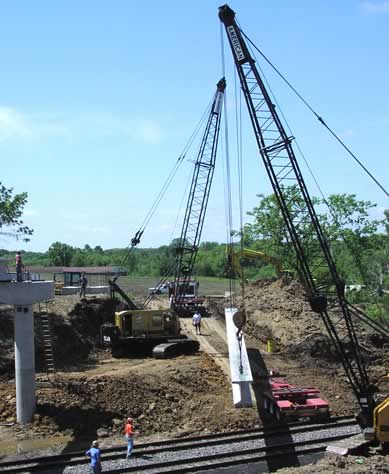
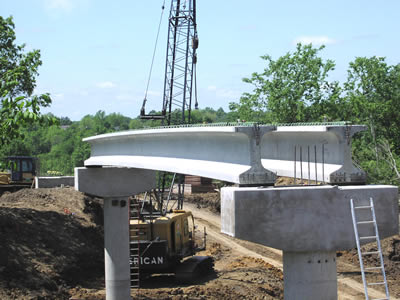
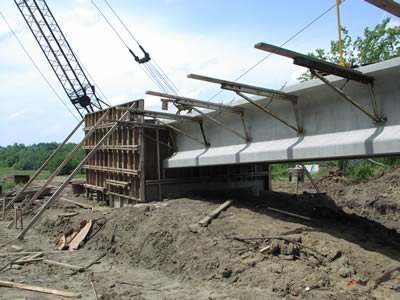
Hoisting the beam. The center span beams weigh about 36 tons each.
Almost there.
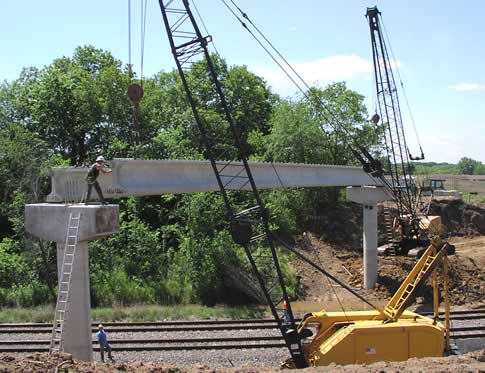
Just a little further.
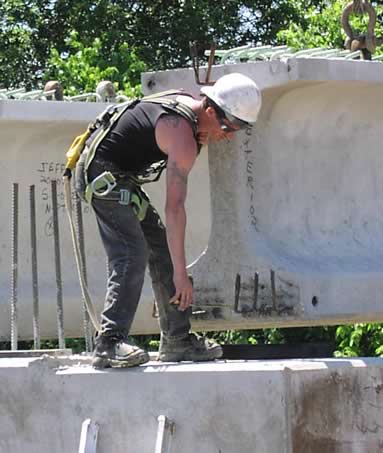
Another inch my way. A worker measures the position of the beam and directs fine adjustments.
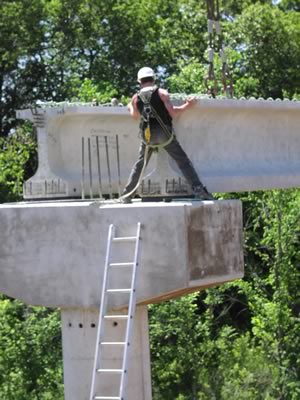
The beam settles into position on its neoprene bearing pad.
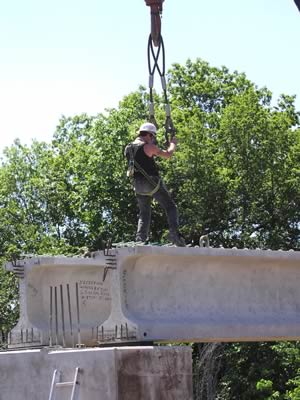
Unhooking the crane cables from the beam.
All done placing the center span beams.
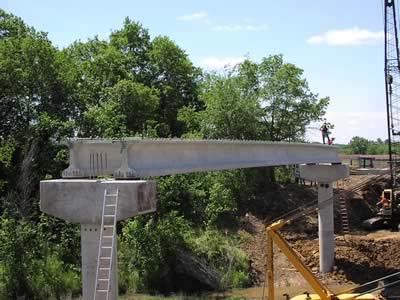
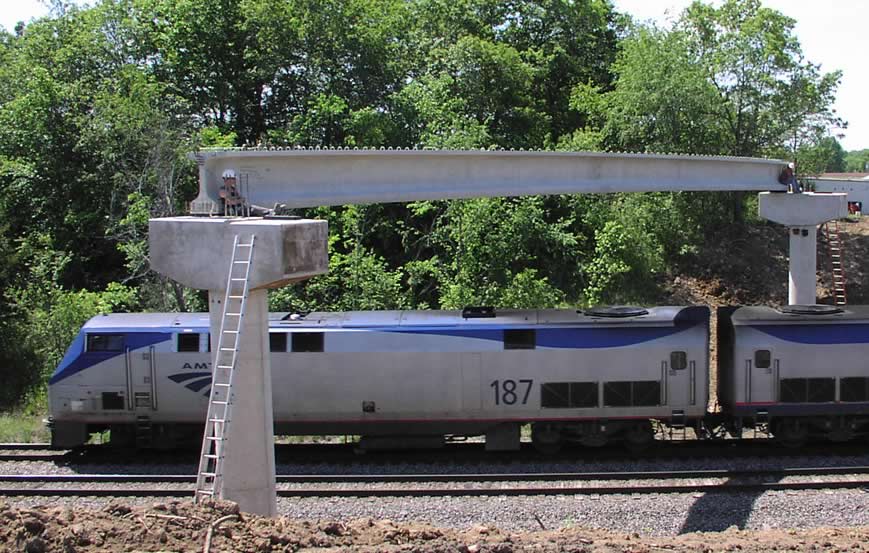
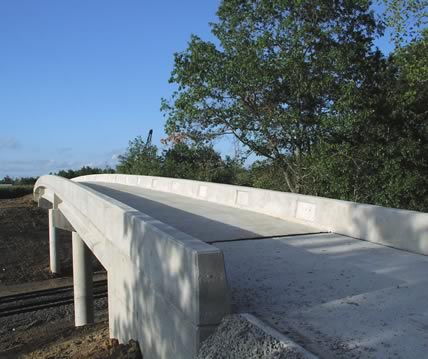
From this angle, the curvature of the beams is apparent. The curvature provides the 25 foot clearance the railroad requires.
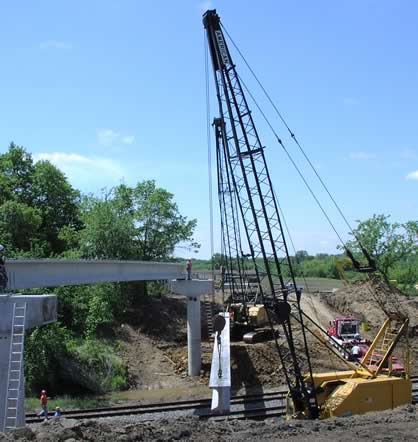
More beams have been placed. The beams for the north span have been set.
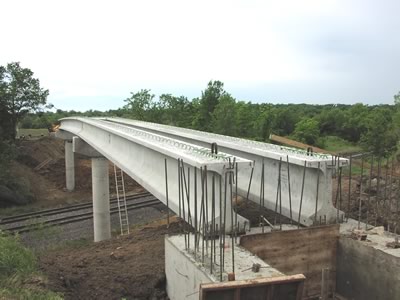
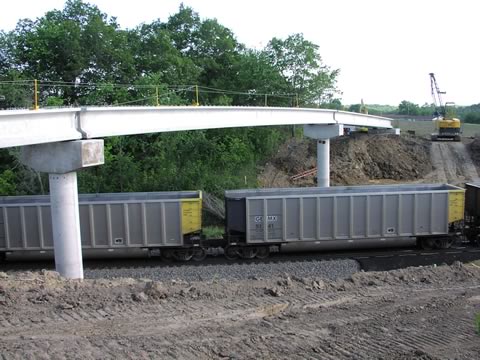
All beams in place.
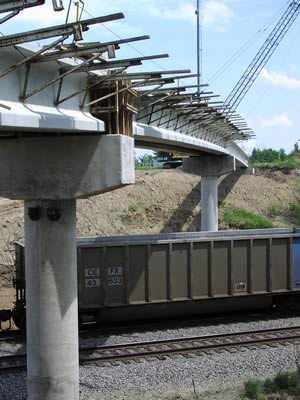
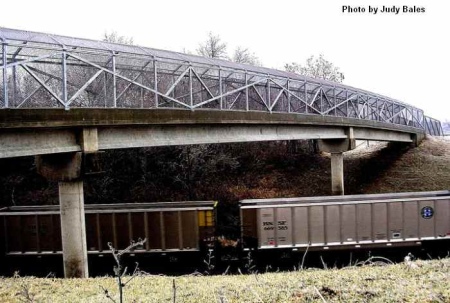
All beams in place, train passing underneath. Empty coal cars going back for more.
Hard core bridge fans can click here for close-up detail photos. Viewer discretion is advised.
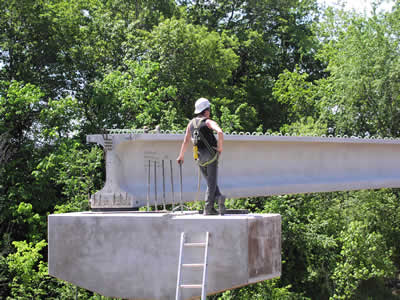
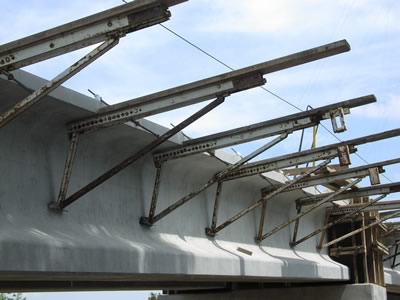
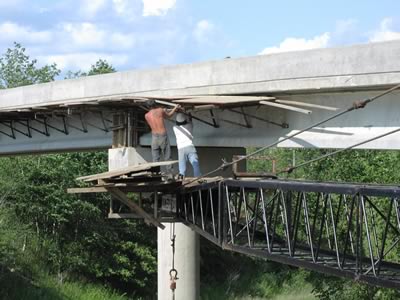
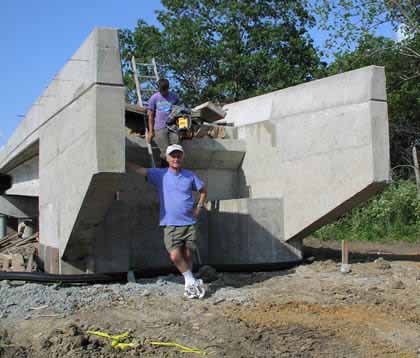
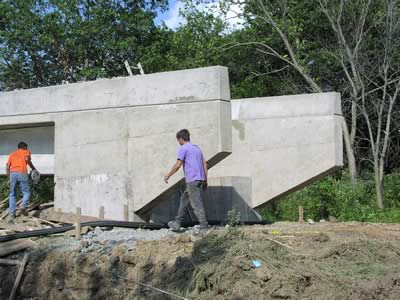
Superstructure: South Abutment. Getting ready for the decking. View showing the "wings".
View from the north.
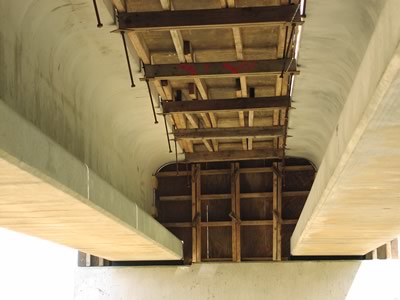
View from below. Also shows the deck forms from below.
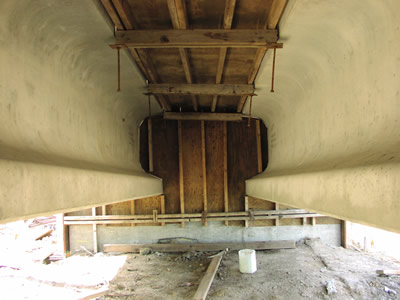
Inside View. Looking down into the forms where concrete will be poured around the end of the beam.
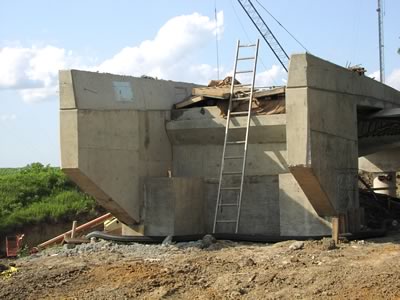
Superstructure: North Abutment. Excavating to make room for the wings.
Rebar, partially complete.
Forms for the north abutment.
Pouring the west wing.
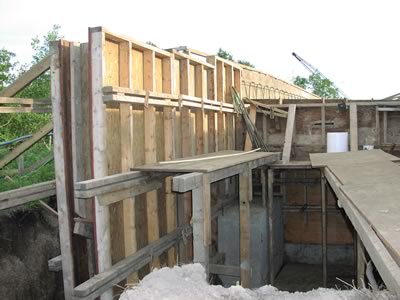
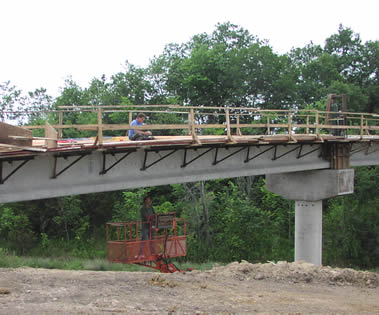
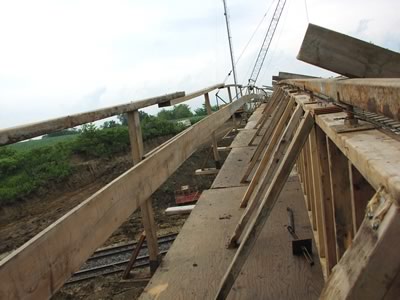
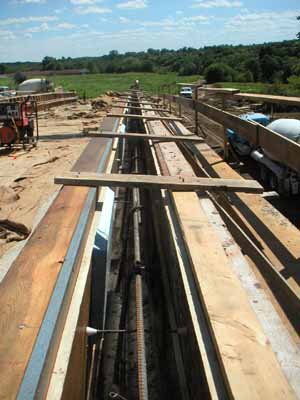
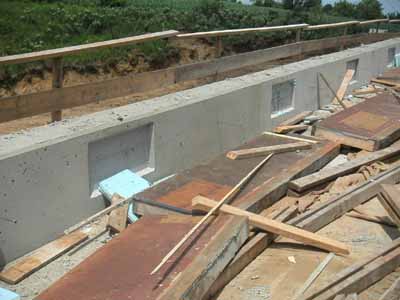
Preparing the forms for the deck. Setting bracing for the deck forms.
Beginning to set deck forms, view from the top.
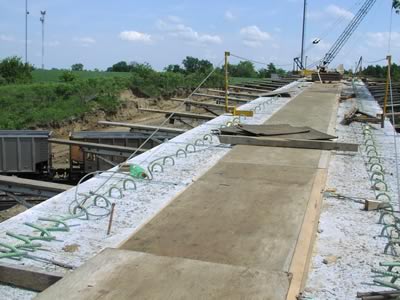
Detail of side bracing for the deck.
Forms over south pier.
Forms over south pier; View from Below. Also shows the deck forms from below.
Fine tuning the deck forms. Working together from above and from below.
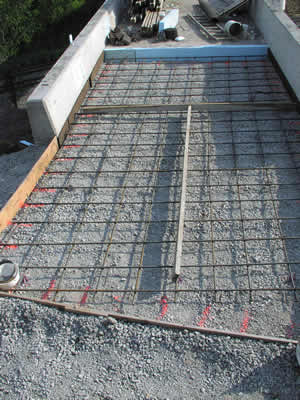
View of the deck forms and rebar.
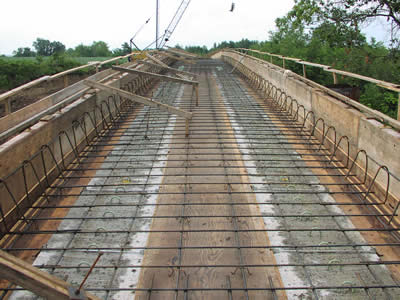
View of the deck forms and rebar emphasizing the rebar for the curb.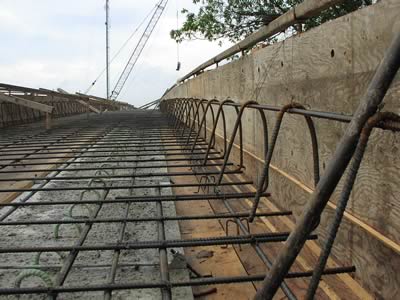
The catwalk.
Testing the concrete mix for the deck. Too much air in the mix, and the concrete is weak. Too little air, and the concrete can't expand and contract without cracking.
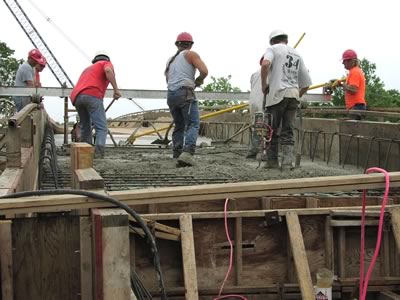
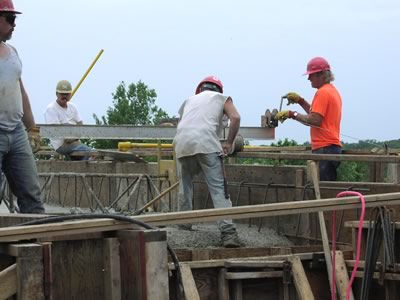
Pouring the deck.
More pouring.
Spreading and finishing the concrete.
Advancing the screed. The surface of the concrete was leveled with a screed that rode on bars along the sides of the bridge. The screed was advanced with a winch at each end.
After the deck was poured, the deck curb forms were built and the concrete was poured. The forms for the deck curb being built.
Pouring the concrete into the deck curb forms.
Finishing the deck curbs.
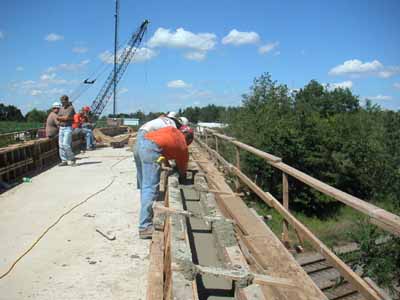
Smoothing the freshly poured curb.
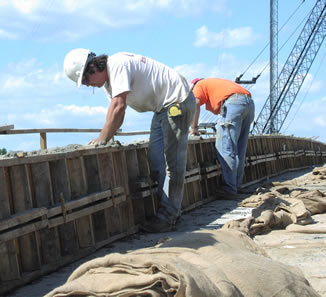
Removing the forms after the concrete has set up.
Riding the boom of the crane to remove the catwalk.
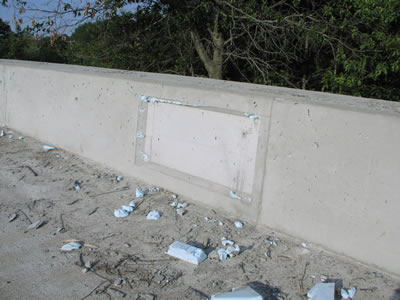
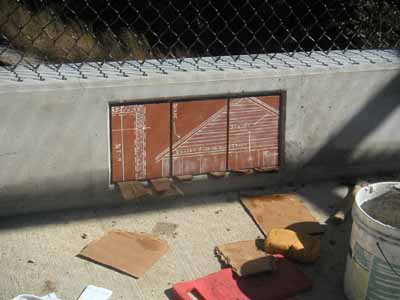
Close-up of the inset where the tiles will be placed on the curbs.
One of the block outs in the curbs, where decorative tiles created by Mark Shafer's students will be placed.
The South Abutment forms are removed. South abutment and curbs with forms stripped off. Ron Blair gives us a perspective.
Another view of the South Abutment.
And another view of the South Abutment.
Grading around the South Abutment.
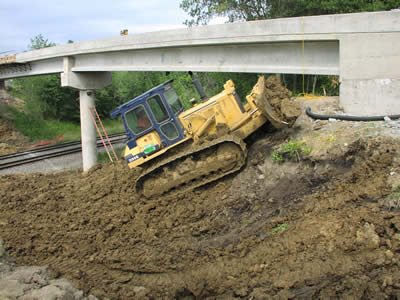
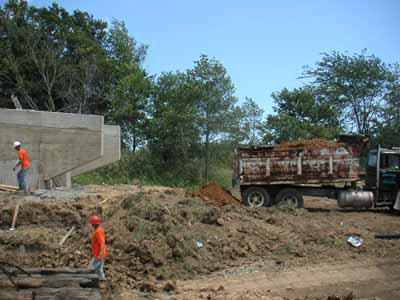
The trail must be built up to meet the end of the bridge. The first load of dirt for the trail construction arrives.
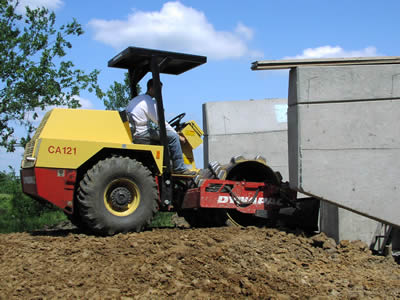
This sheep's-foot roller compacts the dirt.
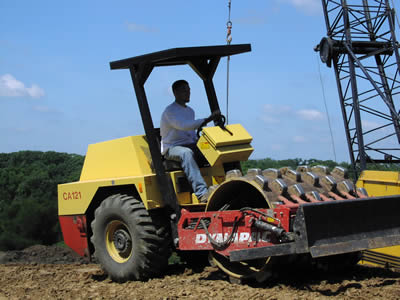
Compacting the south approach.
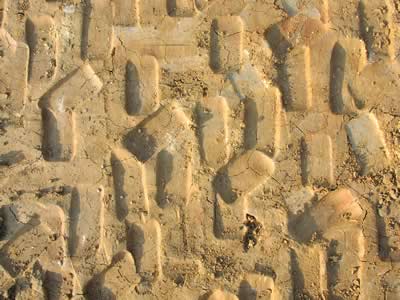
A close-up of the indentations left by the sheep's-foot roller.
Waiting for the forms for the concrete approach ramp to be built.
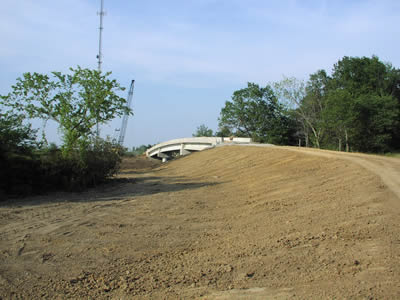
Grading of the approach to the south end of the bridge is complete.
The concrete south approach ramp has been poured.
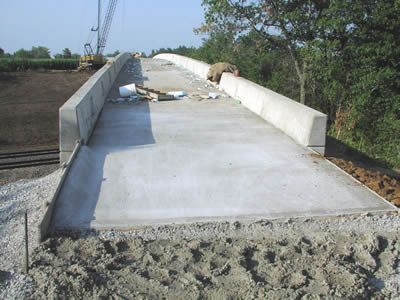
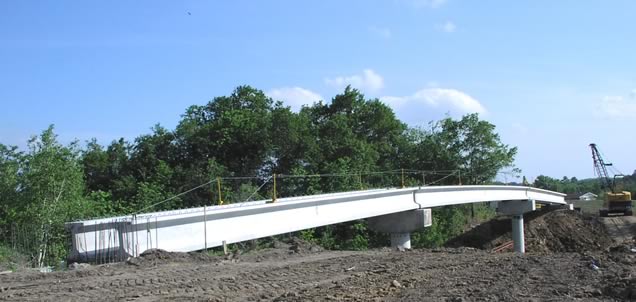
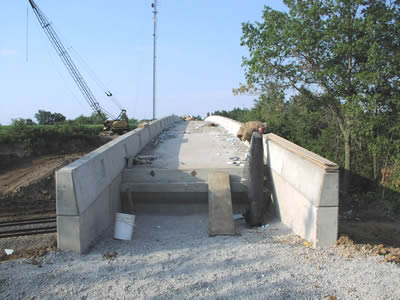
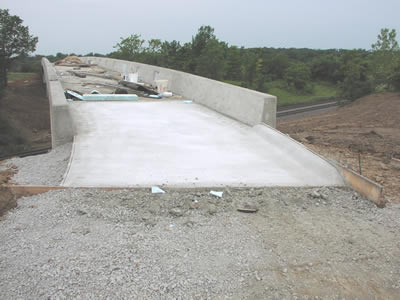
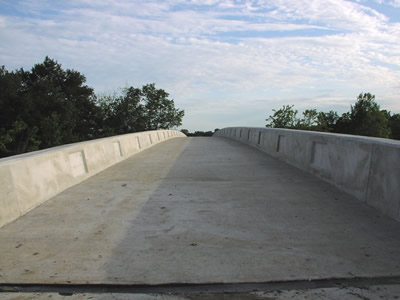
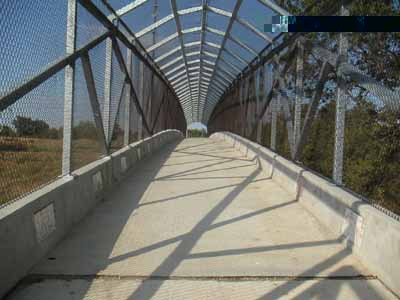
View of the finished deck, from the south.
View of Chautauqua Park from the south ramp.

The north approach does not need a build-up. Rebar for the concrete north approach ramp.
The concrete north approach ramp has been poured.
View of the finished deck, from the north.
The railings and cage must be installed before the bridge can open. We're all eager to use the bridge, but we can't cross it until the fencing on the side of the bridge is in place.
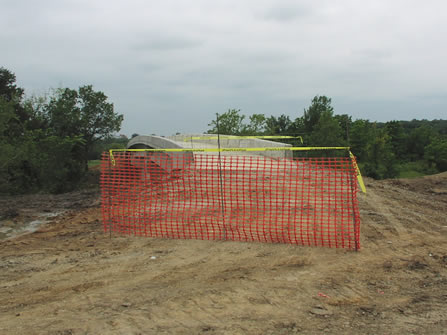
Please don't cross the barriers.
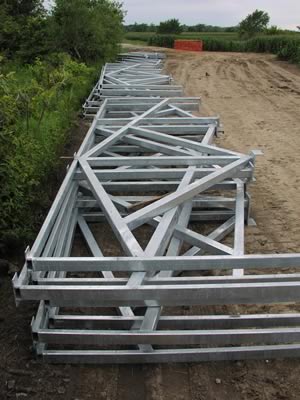
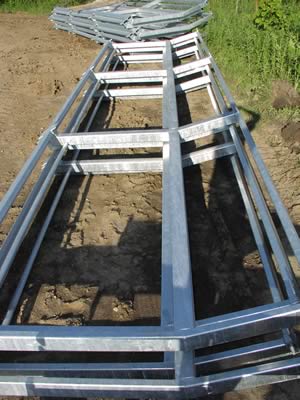
The side panels of the frame for the enclosure has arrived. Pattern designed by artist Judy Bales.
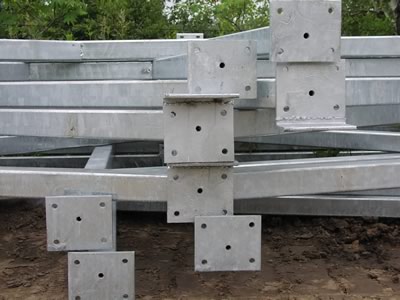
Detail of the side panels.
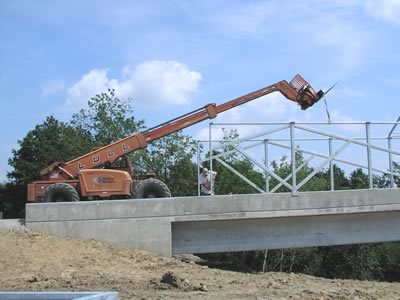
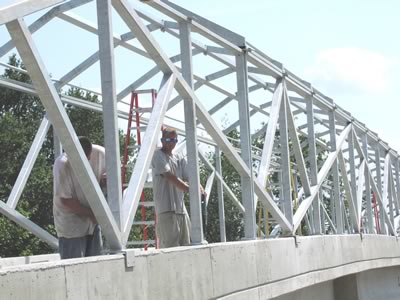
07-13-04. Beginning to erect the frame of the enclosure, starting at the south.
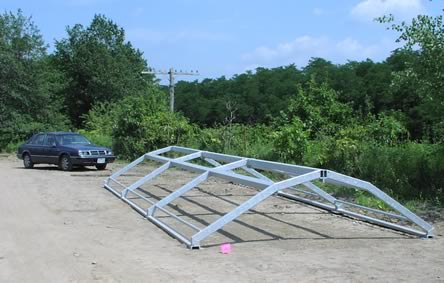
The roof panels of the frame for the enclosure have arrived. It takes a pair of the pieces shown here to span the roof.
Detail of the roof panels.

The first section of the frame for the enclosure has been erected. South end of the bridge.
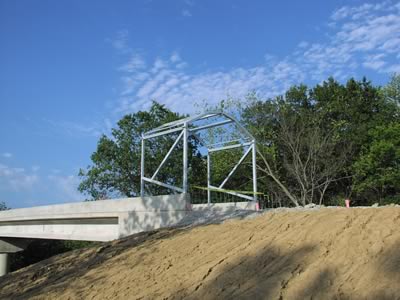
Another view of the first section.
Close-up of the first section. The frame will be covered with chain link mesh.
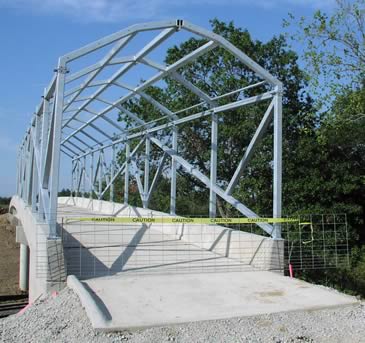
07-17-04. The pattern of the frame begins to take shape.
As more sections are added to the frame, the pattern becomes more apparent.
Another view. (From the south end).
07-21-04. Continuing to assemble the frame.
A section of the roof, assembled and ready to be put into place. The car provides scale.
Erecting a section of frame on the north end of the bridge.
Erecting the frame, looking south.
Erecting the frame while a train passes under the bridge. Looking south.
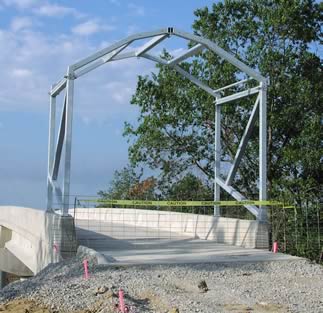
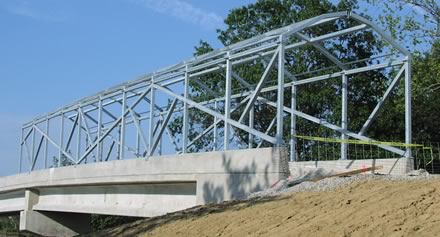
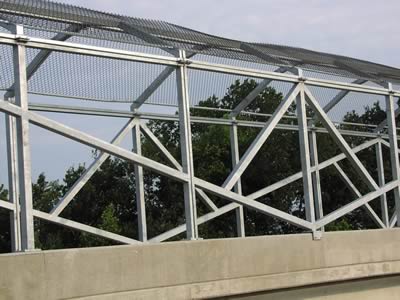
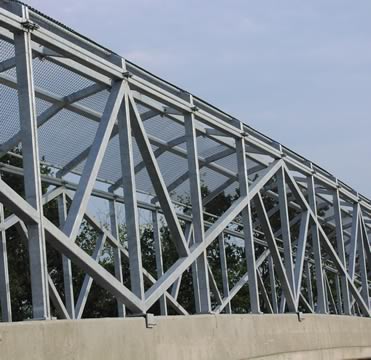
07-24-04. Views of the frame, now complete, waiting for the chain link.
Note Amtrak's California Zephyr heading for San Francisco.

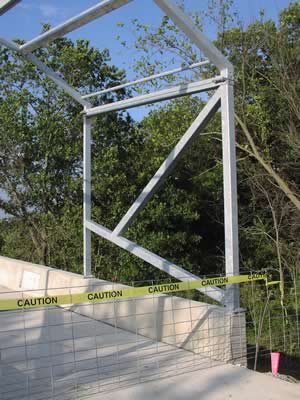
This and the next 2 photos of the frame show how the pattern works, which represents the structure of an old barn. Some chain link has been placed on the top of the frame, but hasn't been stretched and fastened yet.
View # 2 of the frame showing how the pattern works.
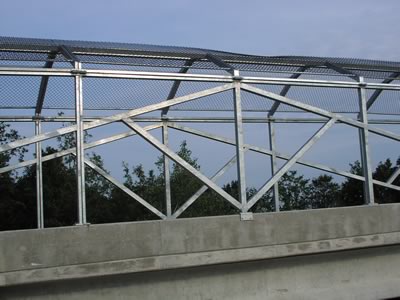
View # 3 of the frame showing how the pattern works.
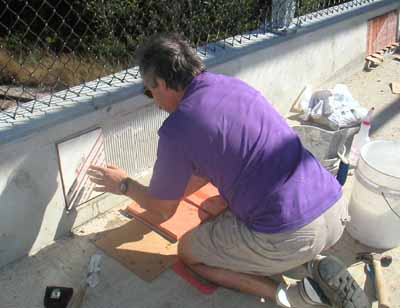
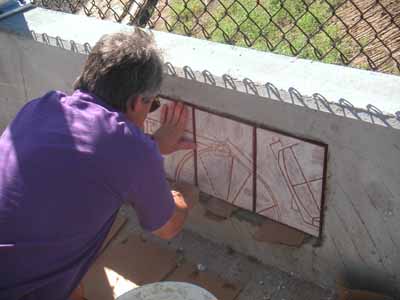
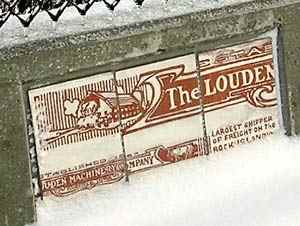
Sept 19...Judith Bales, who designed the bridge covering, and an advisor, Bob Saturley, are mounting the first of 171 tiles on the Louden Bridge side-wall. (Started Sept 9, completed Sept 19, 2004).
Mark Shafer's art class at Fairfield High School designed and glazed the tiles.
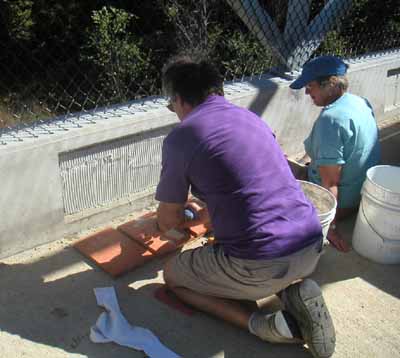
Three tiles will be mounted in each inset.
The ceramic plaques feature images from old Louden Machinery Company blueprints. Louden was a major influence on Fairfield, and on farming from about 1870 to 1940, and on industrial material handling equipment from about 1920 to the present.
Waiting for the adhesive to dry.
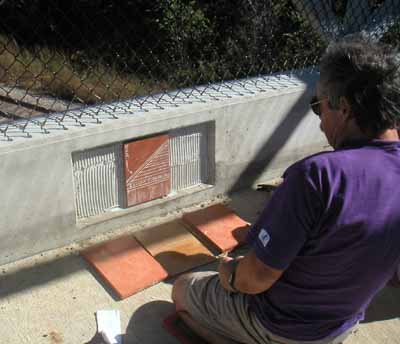
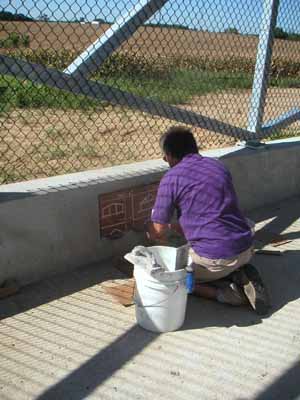
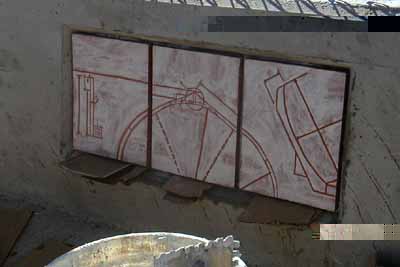
The second set of plaques.
Get it just right.
The second set of plaques wait.
Another plaque. Photo by Judy Bales.
Side view of the Louden Bridge, looking towards the south.
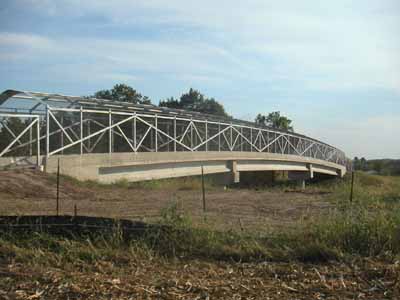
Photo by Judy Bales.
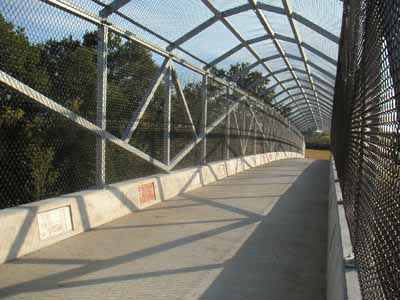
Looking north, the sun creating shadows.
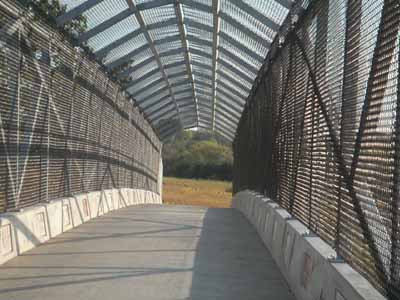
Looking south, the sun creating shadows.
Looking south, the sun creating shadows.
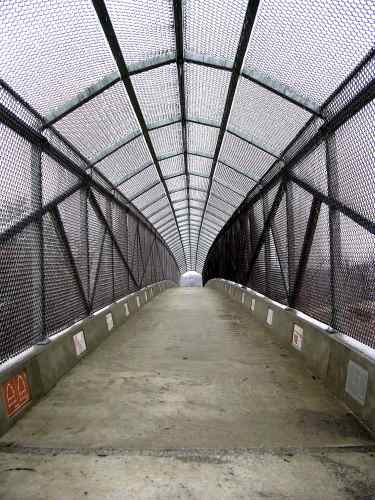
Looking south. Photo by Judy Bales.
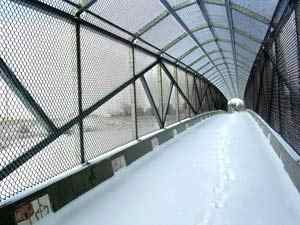
In the Winter, looking North. Photo by Judy Bales.
Thank you for viewing the BNSF Bridge Photo Essay.
Produced by the Jefferson County Trails Council, Fairfield, IA. © June-Sept 2004, reformatted 05-20-16
Every effort is made to ensure accurate information is posted to the site. However, Jefferson County Trails Council does not warrant or guarantee the accuracy, reliability or timeliness of the content on this site or content which is referenced by or linked to this site. © 2001-2016 Jefferson County Trails Council, Fairfield, Iowa. Updated 05-20-16